Showing posts with label Mohawks. Show all posts

Saturday, September 1, 2012

Rolled Mohawk on Natural Hair

I recently posted the following pics on Facebook and I received a few questions about how I achieved the style. 


I decided to do a quick post that shows exactly what I did to create Anisa's rolled mohawk look. 

The Steps

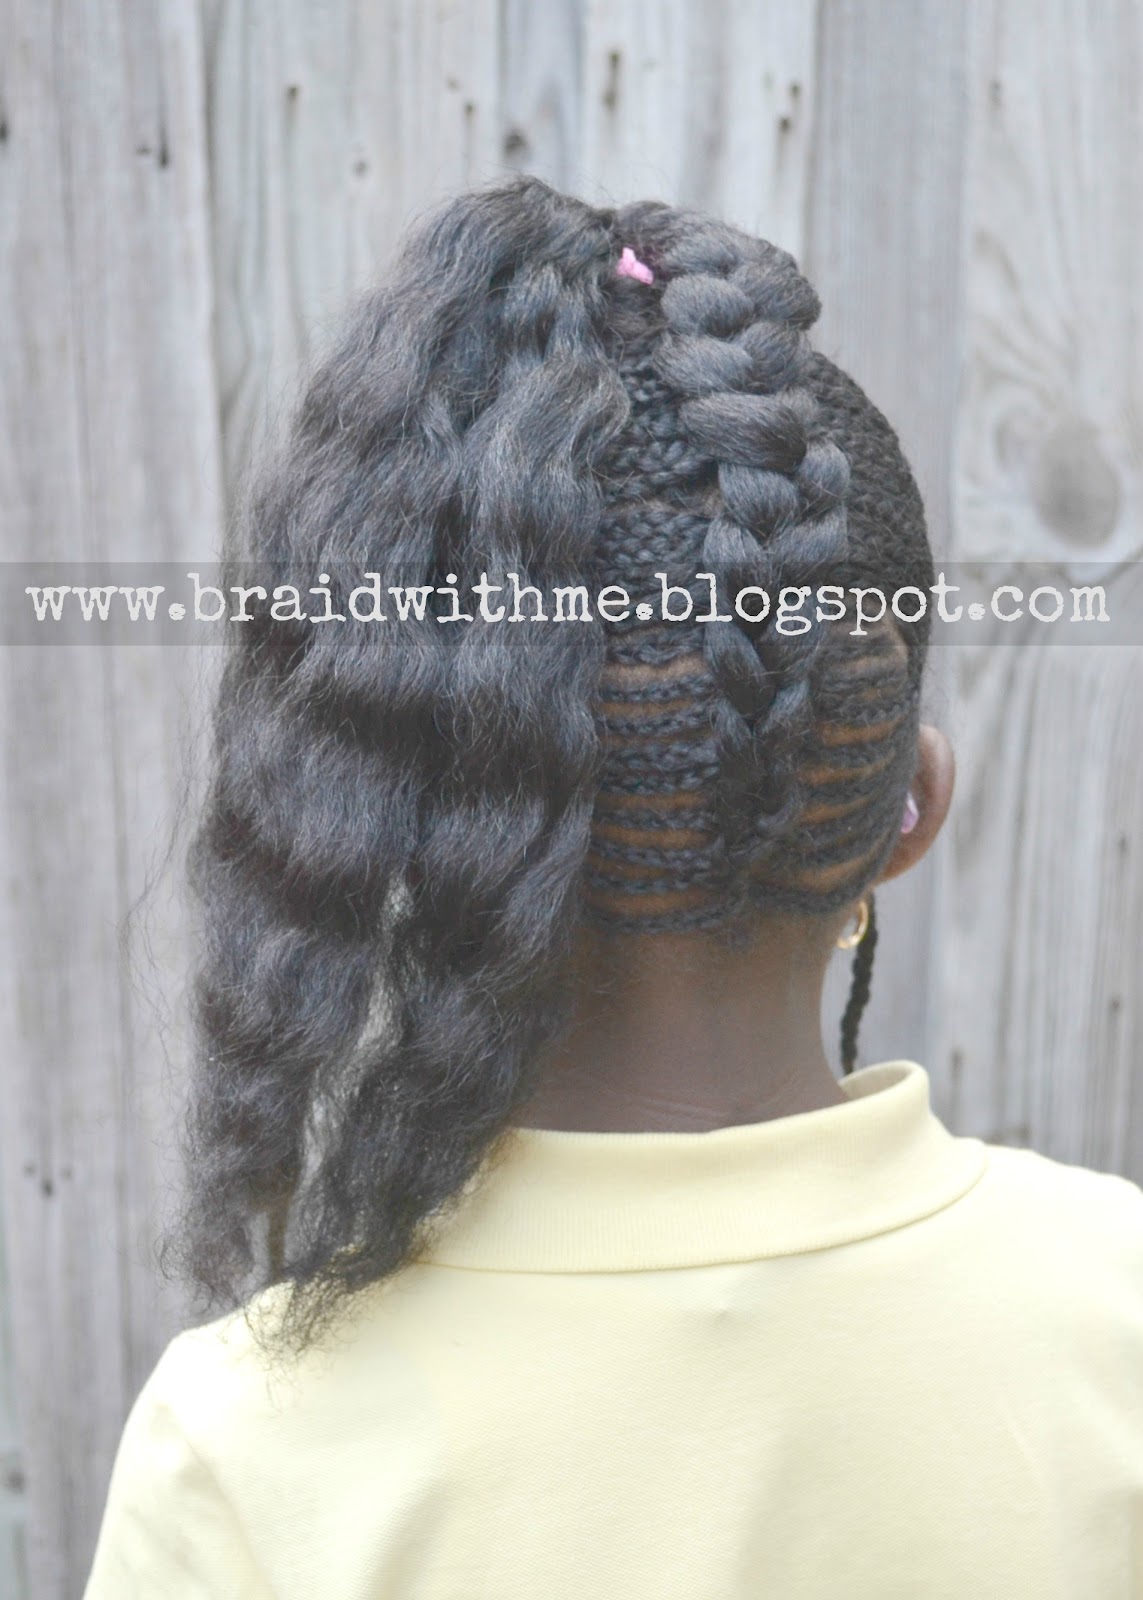
I started with clean, moisturized and detangled hair. Next, I created several ponytails in a mohawk formation. I twisted the ponytails as a way to keep the hair tangle free until I was ready to create the rolls. 


I began creating the rolls in the back and worked my way to the front. For each roll I simply separated the twists into 2 sections, rolled each section separately and pinned them into place. 


I continued in the same fashion until I reached the front. 


Each roll was rolled towards the back except the last two rolls in the front. I separated the front twist into 4 sections. Two of the sections were rolled towards the back and two were rolled towards the front. 


The Result


What Changed?
Anisa's hair looks a little different from the first style. This is due to her recent eczema flair ups. Her hair/scalp are resting now so I created very loose ponytails. Her hair/scalp were also heavily moisturized prior to styling. 

Bedtime Prep
I remove all pins from her hair prior to bedtime. The ponytails were also loosened even more. She sleeps with a satin bonnet and a satin pillowcase. 

Products
Aubrey Organics Ultra-Smoothing Conditioner
Spectrum Organic Virgin Coconut Oil
Shea Moisture Yucca and Aloe Thickening Growth Milk
Ouchless Bands
Hair Pins 


Saturday, August 18, 2012

Back to School Styles for Natural Hair


It's that time of year again!! We wanted to share a few style options for your little naturals who are head back to class!

I'm showing 3 different ways to wear the same style.

Top Style:
I braided her hair in a mohawk fashion and created a center braid that starts at the base and leads to the top. I did not continue to braid at the very top. Instead, I created a cute pompadour type of bun and added a fab bow courtesy of the very talented Tyree of Miss. Teeny Fab Couture. She also created the matching Barbie shirt to match! If you haven't checked out her page, you are definitely missing out!! 


Middle Style:
For this style, I kept the center braid, but I changed it up a little bit. I created three separate center braids that all lead to the top. I then wrapped the ends of her braids around each other and pinned them into place. 


Bottom Style:
For this style, the center braid is made by incorporating the bottom and middle section, but not the top. I made a ponytail for the top section and allowed it to flow freely. I wrapped the end of her braid around the ponytail holder and pinned it into place. 


There you have it! Three different style options from one style! Do you have any back to school styles to share? We would love to see them!!! 


Sunday, April 15, 2012

April Hair Carnival: Copycat Style


It's Hair Carnival time!! This time around I was paired with the talented Michelle and Des of Girly and Curly. Here's a little bit about Michelle in case you've never visited her page: 

I am a mother of three beautiful multi-racial children. My sons are teenagers well on their way to being grown ups and a Girly daughter who loves every second of being a self proclaimed fashionista. This blog will talk about various products that make our life easier and more enjoyable, girly stuff (of course), beauty products, and last but certainly not least naturally curly hair and the care you put into it.

For this carnival,  I chose to recreate a style that is posted on the Girly and Curly Facebook fan page. Be sure to stop by and "Like" her page and visit her Style Gallery for more amazing styles!! 

Here is the original style that Michelle created for Des:


I copied this style as closely as I could, while adding my own special touches. 

Products Used for Styling:
Comb for parting 
Water bottle


I started with clean, detangled, moisturized and stretched hair. Next, I created four ponytails that were each placed in the center. I then created 3 - 5 two-strand twists for each ponytail and wrapped them around into a bun. The buns were secured with hair pins. For the bangs, I looped the twists around in a clockwise motion and instead of using hair pins, I placed a black ouchless hair band around the top to secure it. The remainder of her hair that was not wrapped was unraveled to make curly bangs. I added a matching flower to complete the look. 


We hope that you have enjoyed our Hair Carnival! Click the picture below to visit and "Like" our Facebook fan page to stay up to date on our latest styles. 


Also, visit all of the other wonderful participants in the Hair Carnival by clicking on the links that are provided below. 


Monday, August 1, 2011

Final Update: Braid/Twist Out

At the end of the Day 2, 4, and 5 Updates post I mentioned that the next style would be a braid/twist out. I decided to go with a twist out on Day 6. I unraveled her twists while leaving the cornrows intact. Due to the overall fullness of her hair, the cornrows were barely seen.


Later that night, I moisturized her twist out with Bee Mine Deja's Hair Milk and Luscious Balanced Cream Moisturizer.  I grabbed sections of her hair and made large two-strand twists for bedtime. Her hair was then covered with her satin bonnet.


The next day was Smurf day and she was very excited! She slipped a note under my bedroom door the night before that said, "Wear blue tomorrow!" Lol!! She had her blue dress and silver sandals laid out the next morning! She was ready!!

I decided that this would be the day for the full braid/twist out. I took down her large two-strand twists and cornrows and moisturized her hair once more with the Bee Mine Deja's Hair Milk. Here are the results:


My little Smurfette:


In the end, I was able to make the following variatons to the original style:
  • The original style
  • The original style with loose twists
  • Twist out
  • Braid/twist out


I hope that you enjoyed this style. If you tried this style or any other style that is posted in our Style Gallery, please send pictures!! I would love to share them with the rest of our readers.


Thursday, July 28, 2011

Day 2, 4, and 5 Updates

I decided to share a few pictures to let everyone know how Anisa's Braided, Twisted, and Rolled style is holding up. I am pleased to say that it is holding up very well! I've been moisturizing her hair with Bee Mine Deja's Hair Milk and Bee Mine Juicy Moisturizing Daily Spritz. I must say that it has been doing a great job! She also wears a satin bonnet at night in addition to her satin pillowcase.

Here are pictures from Day 2.


We were really busy on Day 3 so I didn't get a chance to take pictures.  On Day 4 I decided to leave her twists down instead of rolling them. This gave the style a whole new look!


On Day 5 her twists were rolled and pinned once again. Frizz is visible but I am still pleased with how it looks.


The final variation will be a braid/twist out so stay tuned!!

LinkWithin

Related Posts Plugin for WordPress, Blogger...